There’s something undeniably magical about a scoop of ice cream-its rich creaminess, the way it melts slowly on your tongue, delivering waves of comfort and joy. But what if you could capture all that indulgence without any dairy? Welcome to the world of homemade vegan ice cream, where plant-based ingredients blend into luscious, velvety textures that rival any traditional favorite. In this step-by-step guide,we’ll unlock the secrets to making rich and creamy vegan ice cream right in your own kitchen.
whether you’re a seasoned vegan, lactose-intolerant, or simply curious about dairy-free delights, prepare to embark on a appetizing adventure that proves indulgence doesn’t have to come at a cost-just a bit of creativity and a few simple ingredients. Let’s dive in!
Rich & Creamy Homemade Vegan Ice Cream is a luscious delight that beautifully combines the art of selecting plant-based ingredients with culinary finesse to create an indulgent, velvety dessert. Originating from a desire to enjoy classic ice cream textures without dairy,this recipe transforms wholesome,natural components into a creamy masterpiece that thrills every palate-whether vegan or not.
Prep and Cook Time
Preparation: 15 minutes | Chilling: 4 hours | Churning: 30 minutes
Yield
About 1 quart (4 generous servings)
Difficulty Level
Medium – accessible for all home cooks with a bit of patience and an ice cream maker
Ingredients
- 2 cans (13.5 oz each) full-fat coconut milk, well shaken
- 1/2 cup raw cashews, soaked 4 hours or overnight, drained
- 3/4 cup organic maple syrup or agave nectar
- 1 tablespoon vanilla extract, pure
- 1/4 teaspoon sea salt
- 2 tablespoons cornstarch or arrowroot powder (for extra creaminess)
- Optional mix-ins: toasted pecans, cacao nibs, shredded coconut, chopped vegan chocolate chips
instructions
- Blend the base: In a high-speed blender, combine the coconut milk, soaked cashews, maple syrup, vanilla, and sea salt. Blend on high until the mixture is totally smooth, about 2-3 minutes. The soaked cashews provide a silky texture while amplifying creaminess naturally.
- Thicken the mixture: In a small saucepan, whisk the cornstarch with 1/4 cup of the coconut-cashew blend until smooth.Heat the rest of the mixture over medium heat, then slowly whisk in the starch slurry.
- cook to perfection: Keep whisking the custard gently until it thickens enough to coat the back of a spoon, about 5 minutes. Remove from heat and cool completely at room temperature, then chill in the fridge for at least 4 hours or overnight. This chilling step enhances flavor melding and texture.
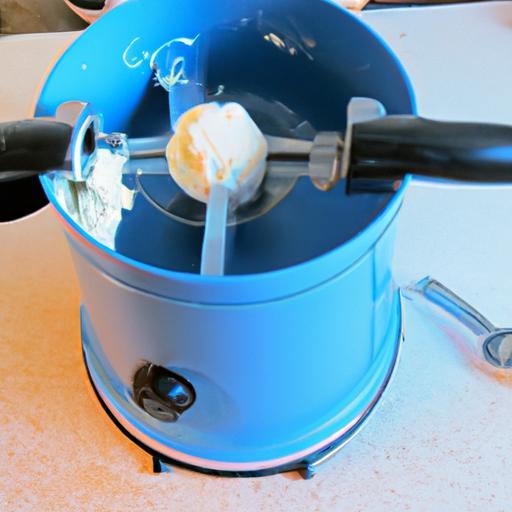
- Churn your masterpiece: Pour the thoroughly chilled base into an ice cream maker and churn according to manufacturer instructions (usually 25-30 minutes) until thick and creamy.
- Add the magic mix-ins: In the last 5 minutes of churning, fold in your favorite toppings like toasted nuts, vegan chocolate chunks, or swirls of fruit preserves for texture and bursts of flavor.
- Freeze to set: Transfer the ice cream to a freezer-safe container, press a piece of parchment on top to avoid ice crystals, and freeze for at least 2 hours for a scoopable consistency.
Tips for success
- Ingredient quality matters: Choose organic, full-fat coconut milk and fresh cashews to achieve the richest texture possible.
- soak cashews properly: This step is key for smooth blending, resulting in melt-in-your-mouth creaminess.
- Adjust sweetness: Maple syrup not only sweetens but adds a warm depth-feel free to modify sweetness to your taste.
- Patience is essential: Chilling the base thoroughly before churning ensures optimal thickness and prevents ice crystals.
- Make-ahead tip: This base keeps well in the fridge for 2 days; churn fresh when ready or freeze directly for a soft-serve style treat.
Serving Suggestions
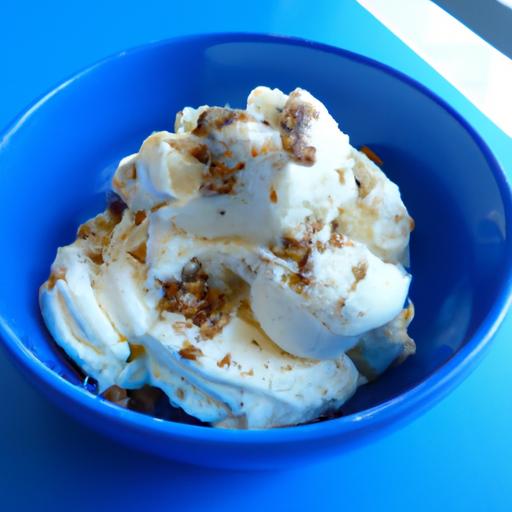
Serve this sumptuous ice cream in crystal-clear bowls or waffle cones to showcase its creamy texture and inviting sheen. Garnish with fresh berries, a drizzle of vegan caramel sauce, or a sprinkle of toasted coconut flakes to add visual and flavor contrast. For a festive touch, dust with a pinch of cinnamon or cocoa powder. Enjoy immediately for the creamiest experiance or let it soften slightly before serving for an ultra-scoopable treat.
| Nutrient | Per Serving (1/4 recipe) |
|---|---|
| Calories | 320 |
| protein | 5g |
| Carbohydrates | 20g |
| Fat | 26g |
For more plant-based dessert inspirations, check out our comprehensive vegan dessert collection.
Learn more about the health benefits of cashews from this Healthline article on cashews.

Q&A
Q&A: Rich & Creamy Homemade Vegan Ice Cream – A Step-by-Step Guide
Q1: Why choose vegan ice cream over traditional dairy versions?
A1: Vegan ice cream isn’t just for those avoiding dairy-it’s a delightful treat that’s kinder to the planet and often packed with nourishing ingredients. Plus, with the right technique, it’s every bit as rich and creamy as classic ice cream, sometimes even more indulgent!
Q2: What’s the secret to making vegan ice cream rich and creamy?
A2: the magic lies in using full-fat plant-based milks like coconut milk or cashew cream, which provide that luscious mouthfeel. Adding natural thickeners like xanthan gum or tapioca starch, along with a good churn, helps transform the mixture into a velvety dream.
Q3: Can I make vegan ice cream without an ice cream maker?
A3: Absolutely! You can still craft silky vegan ice cream by freezing the mixture in a shallow container and stirring vigorously every 30 minutes as it chills. It takes a bit more elbow grease but the creamy reward is well worth it.
Q4: Which plant-based milk works best for homemade ice cream?
A4: Coconut milk is a superstar for creaminess and flavor, but cashew milk offers a neutral base that’s great for experimenting with diverse flavors. Almond or oat milk can work too, though they may need a little extra fat for richness.
Q5: How do I add flavorings without compromising texture?
A5: Incorporate flavor extracts, fresh fruit purées, cocoa powder, or even herbs after blending the base. just be mindful of the liquid content; too much can lead to ice crystals, so balance is key. Using natural sweeteners like maple syrup or agave can also enhance flavor while keeping the texture smooth.
Q6: Any tips for storing homemade vegan ice cream?
A6: Store your creation in an airtight container to prevent freezer burn and ice crystallization. press a piece of parchment paper directly onto the surface before sealing to keep it extra fresh. When ready to serve,let it thaw a few minutes at room temp for that perfect scoop.
Q7: Can I customize vegan ice cream for dietary restrictions?
A7: Definitely! This guide easily adapts to gluten-free, soy-free, and nut-free diets-just swap ingredients according to your needs.For example, use oat or rice milk if nuts are off the table, and ensure your thickeners and sweeteners fit your dietary preferences.
Q8: What’s the first step to confidently make rich & creamy vegan ice cream at home?
A8: Start by gathering your ingredients and chilling your equipment-cold bowls and spoons are allies in keeping your mixture creamy as you work. Then, follow the step-by-step guide patiently and don’t be afraid to experiment-it’s all part of the creamy adventure!
Ready to churn your way to luscious, dairy-free bliss? With this guide, your kitchen becomes an ice cream parlor of plant-powered indulgence!
In Summary
There you have it-a rich, creamy scoop of homemade vegan ice cream crafted entirely by your own hands. With simple ingredients and a little patience, you’ve transformed plant-based staples into a luscious dessert that rivals any dairy treat. Whether you stick to classic vanilla or experiment with vibrant flavors, this guide offers a delicious foundation for endless creativity. So next time the craving strikes, remember: decadence doesn’t have to come from dairy, and the coolest, creamiest vegan ice cream is just a few steps away in your own kitchen. Happy churning!