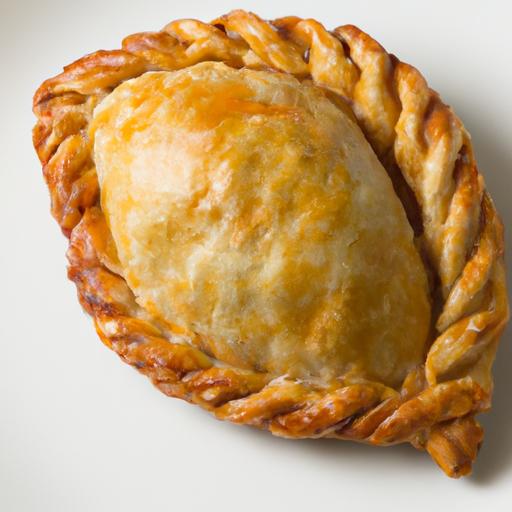
There’s something undeniably magical about biting into a perfectly baked empanada-the flaky,golden crust giving way to a warm,flavorful filling that feels like a comforting hug. but behind that blissful moment lies the true art of mastering empanada dough, a craft that transforms simple ingredients into a canvas of endless culinary possibilities. Whether you’re a seasoned baker or a curious kitchen adventurer, unlocking the secrets to perfect empanada pastry is your ticket to creating irresistible treats every time. In this guide, we’ll unravel the tips, techniques, and little-known tricks that turn ordinary dough into a masterpiece of texture and taste-because great empanadas start with great dough.
Choosing the Ideal Flour and Fat for Flaky Empanada Dough
Mastering Empanada Dough begins with selecting the perfect balance of flour and fat, the foundation of any flaky and tender pastry. Traditionally, all-purpose flour is the go-to choice-its moderate protein content offers just enough gluten advancement to provide structure while keeping the crust tender. For an extra delicate crumb, a blend of pastry flour or cake flour with all-purpose flour softens the bite without compromising flakiness.
The choice of fat is equally critical.Cold, unsalted butter imparts a rich, creamy flavor and creates pockets of steam that seperate the dough into flaky layers as it bakes.Some artisans swear by incorporating a touch of lard or shortening alongside butter to add tenderness and enhance crispness. The key is to work with fats at the right temperature-chilled, but pliable enough to blend evenly. This synergy between flour and fat is what unlocks the magic of flaky empanada dough.
Unlocking the Magic of Proper Dough Hydration and Resting Times
The secret to cohesive dough isn’t just ingredients-it’s hydration and patience. Adding cold liquid, such as ice water or even a splash of vinegar or milk, binds the flour and fat while restraining gluten formation for a delicate crumb. The hydration level should be just enough to bring the dough together without stickiness; too much water leads to toughness, too little causes cracking.
Once kneaded briefly, the dough needs to rest for at least 30 minutes (preferably 1 hour) in the refrigerator. This resting phase firms the fat, relaxes gluten strands, and makes rolling far more manageable. Wrapping it tightly is essential to prevent drying out. Embrace this downtime as the moment your dough transforms, setting the stage for irresistible flakiness.
Techniques for rolling and Shaping Empanadas like a Pro
When rolling out your dough,aim for an even thickness of about 1/8 inch (3 mm). Lightly dust your surface and rolling pin with flour to prevent sticking, but avoid excessive flour that can dry the dough. Rotate the dough frequently to maintain a circular shape and uniform thickness for even baking.
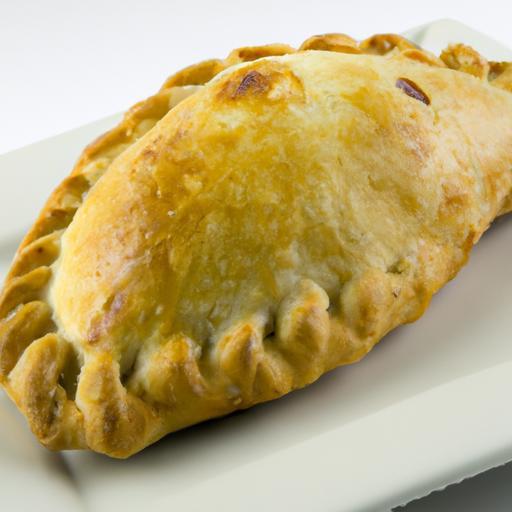
For shaping, use a 4-5 inch round cutter to create perfect discs. don’t worry if the edges look slightly uneven-folding gives the dough its character. Place a tablespoon of filling in the centre, fold into a half-moon, and gently press the edges to seal. Traditional crimping techniques add both security and elegance, ensuring your filling stays put and inviting a golden, crispy finish.
Secrets to Achieving Golden Crispy perfection in Every Bite
Achieving that enviable golden crust is a combination of oven temperature, egg wash, and timing.Preheat your oven to 375°F (190°C) to allow the empanadas to cook through while crisping up beautifully on the outside. Brush the tops with a beaten egg mixed with a teaspoon of water-this simple step ensures a lustrous,blistered surface that snaps delightfully with every bite.
For a deeply golden hue and ultra-crispy texture,bake the empanadas on a preheated baking sheet or a pizza stone,which radiate heat evenly. Rotate the tray halfway through baking to avoid hot spots and check for bubbling, golden edges. Let them cool just a few minutes before serving to allow the crust to set perfectly, preserving that signature flaky crunch.
Prep and Cook Time
- Prep Time: 40 minutes (including dough resting)
- Cook Time: 20 minutes
- Total Time: 1 hour
Yield
Approximately 12 medium empanadas (4-5 inch diameter)
Difficulty Level
Medium – perfect for confident home bakers eager to master pastry basics and elevate their technique.
Ingredients
- 2 cups all-purpose flour, sifted (or blend 1 ½ cups all-purpose flour + ½ cup pastry flour for extra tenderness)
- ½ teaspoon fine sea salt
- ¾ cup cold unsalted butter, cut into small cubes
- 1 large egg, lightly beaten
- 3-4 tablespoons ice-cold water
- 1 tablespoon white vinegar (optional; enhances tenderness)
Instructions
- Mix the dry ingredients. In a large bowl, whisk together the sifted flour and salt until evenly combined.
- cut in the butter. Add the cold butter cubes to the flour. Using a pastry cutter,two knives,or your fingertips,work the butter into the flour until the mixture resembles coarse crumbs with some pea-sized pieces remaining. This variation in size creates flaky layers.
- Combine egg and liquid. Lightly beat the egg, then stir in the ice water and vinegar (if using). Add this wet mixture gradually to the flour-butter mixture, tossing gently with a fork until the dough just starts to come together.
- Form the dough. Turn the dough onto a lightly floured surface and gently knead 4-5 times to unify. avoid overworking-tough dough is the enemy of flakiness.
- Rest the dough. Shape the dough into a disk, wrap tightly in plastic wrap, and chill in the refrigerator for 30 minutes to 1 hour. This step chills the fat and relaxes gluten, making the dough easier to roll and crispier when baked.
- Roll out the dough. On a floured surface, roll the dough to about 1/8 inch thickness. Use a round cutter (4-5 inches) to create empanada discs. Be sure to reroll scraps only once to maintain tenderness.
- Fill and seal. Spoon your preferred filling into the center of each disc (about 1 tablespoon per empanada). fold dough over to form a half-moon and press edges to seal. Crimp edges by folding small pinches or pressing with a fork.
- Prepare for baking. Place empanadas on a parchment-lined baking sheet.brush each with an egg wash made from one beaten egg and a teaspoon of water,to encourage rich color and shine.
- Bake. Preheat the oven to 375°F (190°C). Bake empanadas for 18-22 minutes until golden brown and crisp. Rotate the pan halfway through baking for even color.
- Cool and serve. Allow empanadas to rest 5 minutes after baking. This rest firms the crust and prevents sogginess.
Tips for Success
- Keep everything cold. Chill your butter, water, and even flour if possible to prevent premature melting of fats, which ruins flakiness.
- Don’t overwork the dough. Handle the dough gently to avoid developing too much gluten, which leads to tough empanadas.
- Egg wash boosters. For extra gloss, mix a pinch of sugar in the egg wash; for a matte rustic finish, brush with milk instead.
- Make ahead. Dough can be prepared and refrigerated up to 24 hours, or frozen for up to 1 month. Thaw in the fridge before rolling.
- Filling tip. Ensure fillings are cooled to room temperature before encasing so they don’t steam the dough and cause sogginess.
Serving Suggestions
serve these crisp, golden empanadas warm-perfect as an appetizer or main course. Pair them with vibrant chimichurri sauce or a smoky roasted pepper aioli for dipping. Garnish with fresh parsley or chopped cilantro to brighten the presentation. A simple side salad with tangy vinaigrette balances the richness beautifully and invites guests back for another golden, flaky bite.
| Nutrient | Amount per Empanada |
|---|---|
| Calories | 210 kcal |
| Protein | 4 g |
| Carbohydrates | 20 g |
| Fat | 12 g |
Complement your empanadas with this vibrant Chimichurri sauce recipe for a delicious twist. For further reading on the science behind flour selection, see this detailed guide from King Arthur Baking.

Q&A
Q&A: Mastering Empanada Dough – secrets to Perfect pastry Every Time
Q1: What makes empanada dough diffrent from other pastry doughs?
A1: Empanada dough strikes the perfect balance between tenderness and sturdiness. Unlike flaky pie crusts or puff pastries, it must be pliable enough to fold without cracking, yet strong enough to hold a flavorful filling without leaking. The magic lies in a simple blend of flour, fat, liquid, and a pinch of salt-each ingredient working in harmony to create that signature texture.
Q2: Should I use butter, lard, or oil for the dough?
A2: Ah, the age-old debate! Butter lends a rich, slightly sweet flavor and a tender crumb, while lard brings an unbeatable flakiness and distinctive savory depth. Oil, on the other hand, creates a more pliable dough with a subtler taste. For classic empanadas,many bakers swear by lard or a mix of lard and butter. Feel free to experiment, but remember: the fat you choose shapes both texture and character.
Q3: What’s the secret to keeping empanada dough from being dry or crumbly?
A3: Hydration is king. using the right amount of liquid-be it water, milk, or even broth-ensures the dough stays soft and workable. Too little moisture,and the dough cracks; too much,and it becomes sticky and hard to handle. Add liquid gradually, and don’t be afraid to rest your dough wrapped in plastic for at least 30 minutes.Resting allows gluten strands to relax, making rolling and shaping a breeze.
Q4: Is it necesary to chill the dough before rolling?
A4: Absolutely! Cooling the dough helps the fat firm up, which adds structure and prevents shrinkage during baking or frying. It also relaxes the gluten, making the dough easier to roll out evenly. A good chill time is around 30 minutes to an hour, wrapped tightly to prevent drying out.
Q5: Can I make the dough ahead of time? How should I store it?
A5: Yes, empanada dough is quite amenable to advance prep. After mixing and kneading, wrap it tightly with plastic wrap and refrigerate for up to 3 days. For longer storage, freeze the dough for up to a month-just thaw it overnight in the fridge before rolling. This convenience lets you focus on fillings when you’re ready to assemble.
Q6: How thin should I roll out the dough?
A6: Aim for a dough thickness of about 1/8 inch (3 mm).Too thick, and your empanadas can become doughy; too thin, and they risk tearing or bursting. The perfect thickness allows the filling to shine while providing gentle support. Keep your rolling pin and surface lightly floured to avoid sticking without drying out your dough.
Q7: What’s the best way to seal empanadas without the filling leaking?
A7: Crimping is both practical and decorative. After placing the filling on one half of the dough circle, fold it over and gently press the edges together. Then, pinch or fold the edges using your fingers or a fork to create a tight seal. For juicy fillings, lightly brushing the edges with water or beaten egg before sealing helps “glue” the dough together. This keeps your empanadas intact during baking or frying.
Q8: Any tips for achieving a golden, crisp finish on baked empanadas?
A8: An egg wash is your best friend-simply brush the surface with a beaten egg or egg yolk mixed with a splash of water or milk. This imparts a luscious golden color and a subtle sheen.Bake in a preheated oven at a moderately hot temperature (around 375-400°F or 190-200°C) to ensure even browning and a crisp crust.
Q9: Can I use gluten-free flour to make empanada dough?
A9: Yes, though it requires some finesse. Gluten-free flours lack the elasticity that gluten provides, so adding binders like xanthan gum or psyllium husk is essential. Also, the dough will be more delicate and prone to cracking, so handle gently and consider baking instead of frying. Experimenting with blends of rice flour, tapioca starch, and chickpea flour can yield tasty results.
Q10: What’s the most common mistake to avoid when making empanada dough?
A10: Overworking the dough. Kneading develops gluten, but too much can make the dough tough and chewy-exactly the opposite of the tender, flaky texture you’re after.Mix just until everything comes together, then let the dough rest. patience and a light touch are the hallmarks of perfect empanada dough every time.
Mastering empanada dough is an art balanced between science and soul. With these secrets tucked away, every batch you craft will be a golden treasure-crispy, tender, and irresistibly delicious.Happy baking!
Wrapping Up
Mastering the art of empanada dough is more than just following a recipe-it’s about embracing the craft that transforms simple ingredients into golden pockets of deliciousness. With these secrets tucked under your apron, you’re equipped to create pastry that’s tender yet sturdy, flaky yet soft, and perfectly balanced every single time. So, whether you’re a seasoned baker or just starting your culinary journey, remember: the perfect empanada begins with the dough, but it’s your patience, practice, and passion that will truly bring it to life. Now, roll up your sleeves, dust off that rolling pin, and get ready to turn humble dough into unforgettable flavors-one empanada at a time.